---
title: Dual Tracking Camera Installation – Padel
description: The Wingfield Dual Camera Module (DCM) is the tracking camera unit of your Wingfield AI Pro system and it's mounted in the middle of the court over the court portal. This guide walks you through three possible mounting options on a padel court.
image: https://help.wingfield.io/hubfs/Preview%20Images/headerDcm.jpg
---
[Skip to content](https://help.wingfield.io/en/dcm-padel#main-content)
- [English](https://help.wingfield.io/en/dcm-padel)
- [Deutsch](https://help.wingfield.io/dcm-padel)
English
Show submenu for translations
[](https://help.wingfield.io/en?hsLang=en)
Open main navigation
Close main navigation
- - [English](https://help.wingfield.io/en/dcm-padel)
- [Deutsch](https://help.wingfield.io/dcm-padel)
English
Show submenu for translations
- [Contact us](mailto:service@my-wingfield.com)
[Contact us](mailto:service@my-wingfield.com)
Hey! How can we help you?
- There are no suggestions because the search field is empty.
1. [Wingfield Help Center](https://help.wingfield.io/en?hsLang=en)
2. [Installation](https://help.wingfield.io/en/installation?hsLang=en)
3. [Installation Guide - Dual Tracking Camera](https://help.wingfield.io/en/installation?hsLang=en#installation-guide-dual-tracking-camera)
September 11, 2026
# Dual Tracking Camera Installation – Padel
## Learn how to safely mount the Wingfield Dual Camera Module (DCM) on your padel court, with three mounting options for any cage setup.
**These installation instructions apply to the following system types:**
- **❌ Wingfield Cam+**
- **✔ Wingfield AI Pro**
The Wingfield Dual Camera Module (DCM) is the tracking camera unit of your Wingfield AI Pro system and it's mounted in the middle of the court over the court portal.
**In this article, you’ll learn:**
- ✔ What to consider during installation to ensure optimal tracking performance (🔗**[Quick Link](https://help.wingfield.io/en/dcm-padel#alignement)**)
- ✔ Which mounting options are available (🔗 **[Quick Link](https://help.wingfield.io/en/dcm-padel#mount-overview)**)
### Align your camera properly
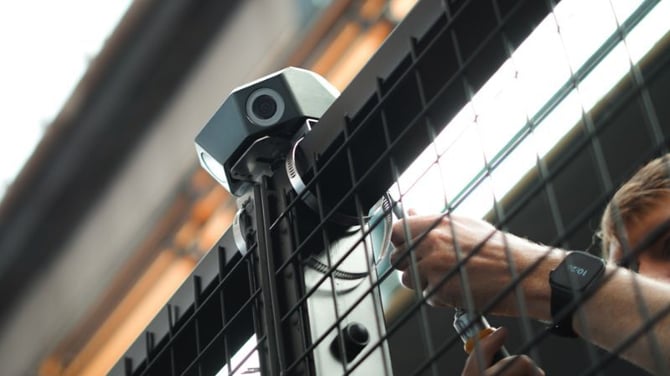
Before we walk you through the three mounting options, there's one important thing to understand: camera alignment and calibration. Regardless of which mounting option you choose, proper alignment is essential for reliable ball tracking.
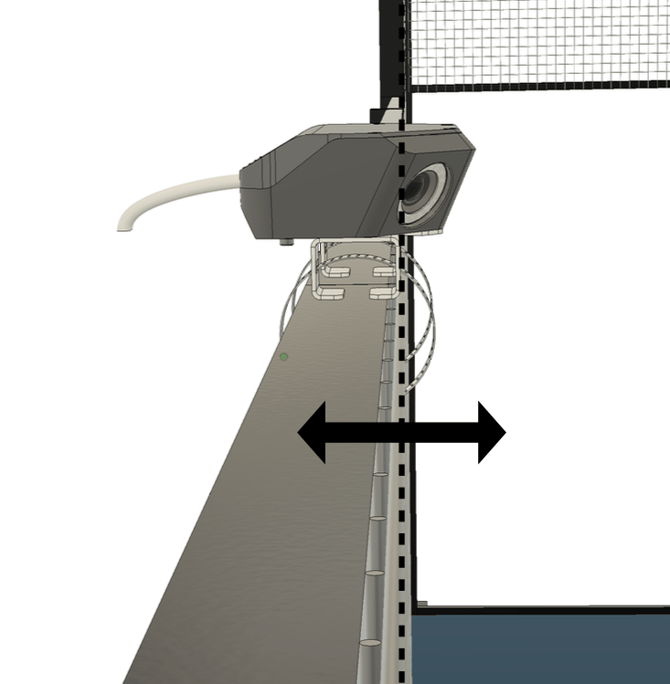
To ensure the camera angles can cover the entire court, the Dual Camera Module (DCM) must extend slightly into the court. With 🔗 **[Mounting Option 1](https://help.wingfield.io/en/dcm-padel#top-mount)**, the supplied spacers automatically ensure the correct offset. For the other two mounting options, you'll need to make sure the DCM extends far enough into the court yourself.
⚠️ **Attention:** The following illustration shows the correct alignment using one of the three mounting options as an example.
### 
### ❌ Incorrect
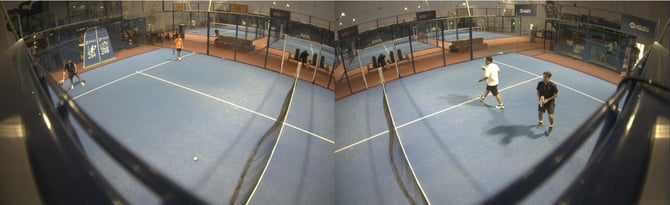
In this example, the Dual Camera Module does **not** extend far enough into the court. As a result, the front areas of the court are obstructed by the crossbar and cannot be tracked properly.
### ✅ Correct
Here, the Dual Camera Module extends slightly into the court, ensuring that all corners of the court are clearly visible.
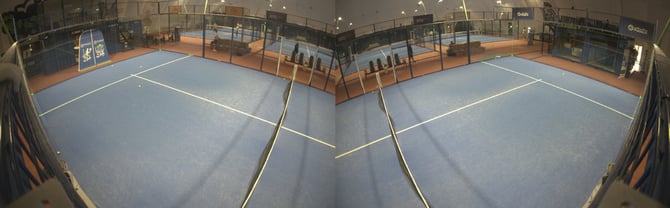
☝🏻 **By the way:** Once you have installed the [🔗 **Court Terminal**](https://help.wingfield.io/en/terminal/mount-padel?hsLang=en), you can display a live image from the Dual Camera Module to check its alignment.
### **Dual Camera Module Mounting Options For Padel Courts**
☝🏻 **By the way:** Which option to pick depends on your cage structure and whether you want the cable running over the top of the cage or not.
| **Mounting options** | |
| --- | --- |
| 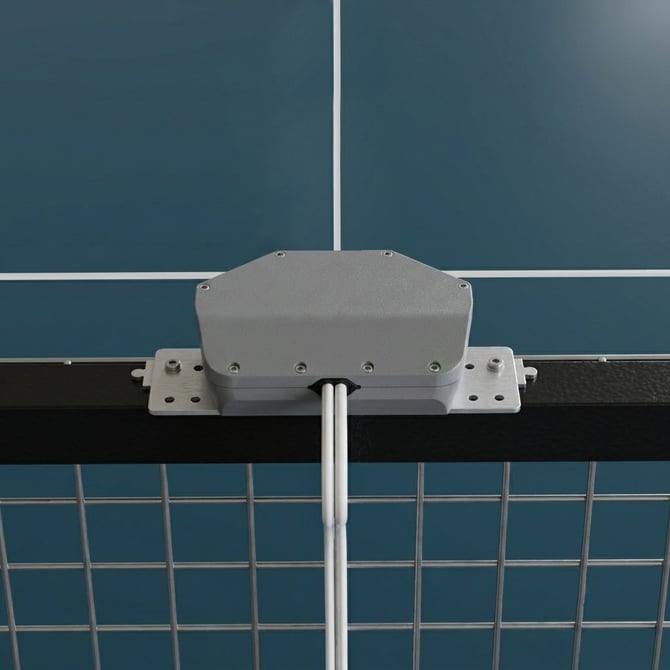 | **1 – Top mount (screw-in)** The DCM screws directly onto the horizontal bar. **✔ When to use:** No visible cable on the cage. **[➡️ Jump to Guide](https://help.wingfield.io/en/dcm-padel#top-mount)** |
| 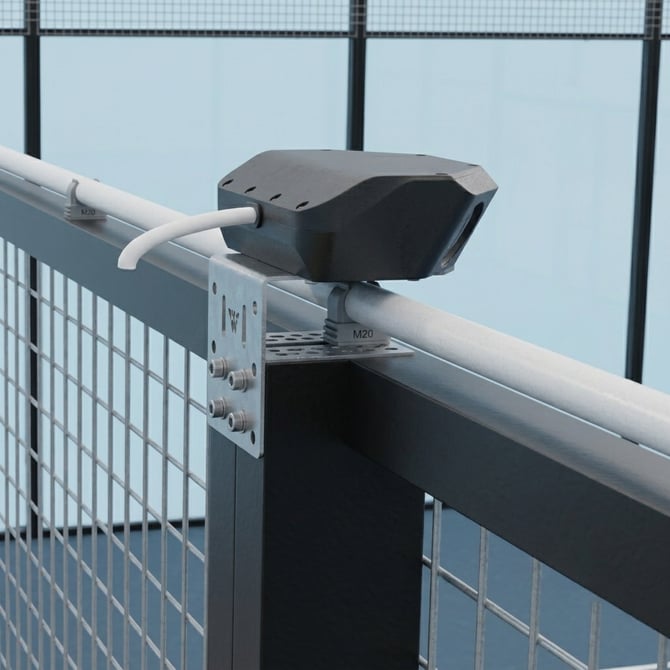 | **2 – Back mount (screw-in)** The DCM sits on a bracket attached to the vertical post. ✔ **When to use:** Cable runs over the top of the cage. **[➡️ Jump to Guide](https://help.wingfield.io/en/dcm-padel#back-mount)** |
| 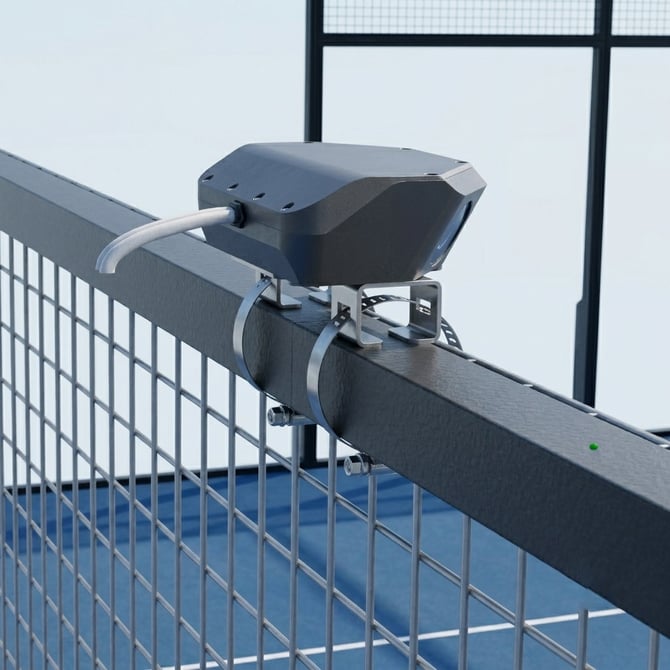 | **3 – Top mount (clamp)** The DCM clamps onto the horizontal bar with hose clamps, no drilling needed. ✔ **When to use:** No visible cable on the cage. Yu don't want to drill into the bar [**➡️ Jump to Guide**](https://help.wingfield.io/en/dcm-padel#clamp) |
#### Mounting Option 1: Top mount (screw-in)
---

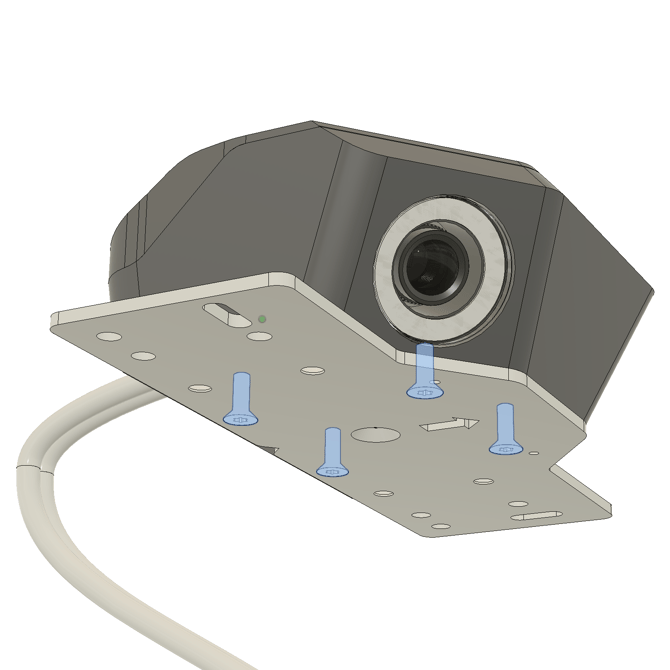
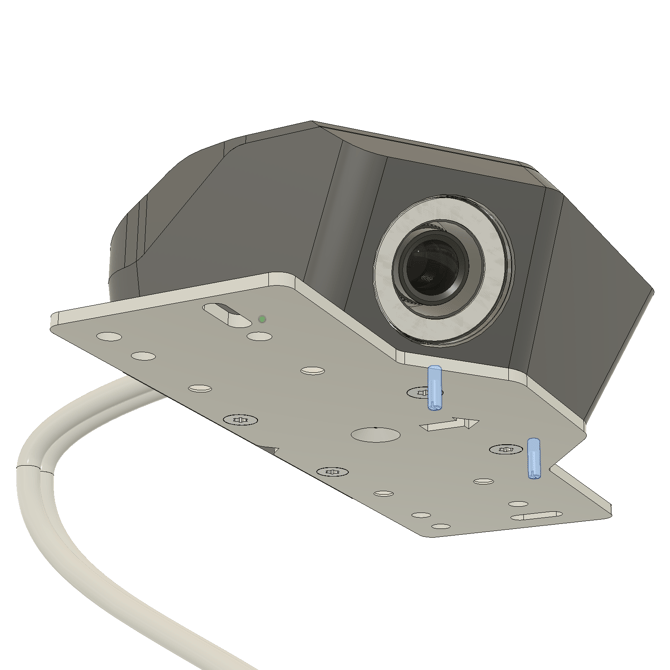
1. **Attach the mounting plate:** Screw the mounting plate to the bottom of the DCM using 4x M4x10mm screws.
2. **Insert the alignment screws:** Thread the 2x M3x12mm set screws halfway into the sides — they'll grip the bar and hold the DCM's position in the next step.
**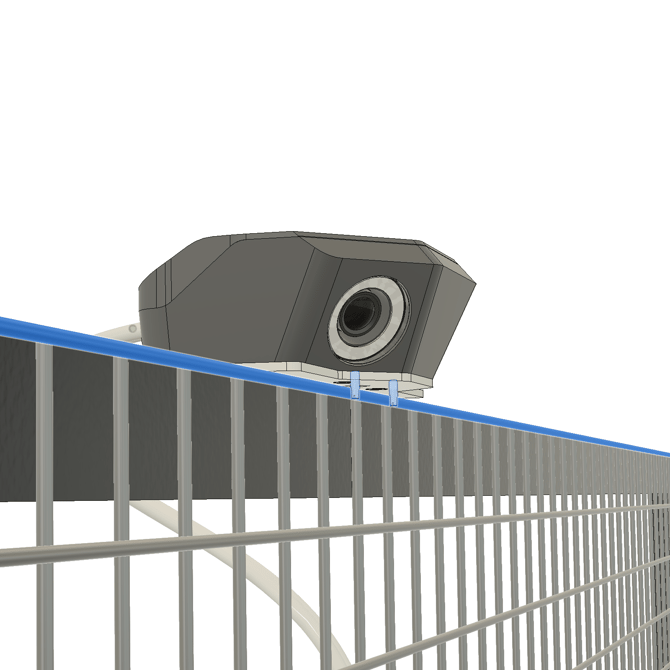**
3. **Position the DCM on the cage:** Place the DCM on top of the horizontal bar, centered above the baseline of the court.
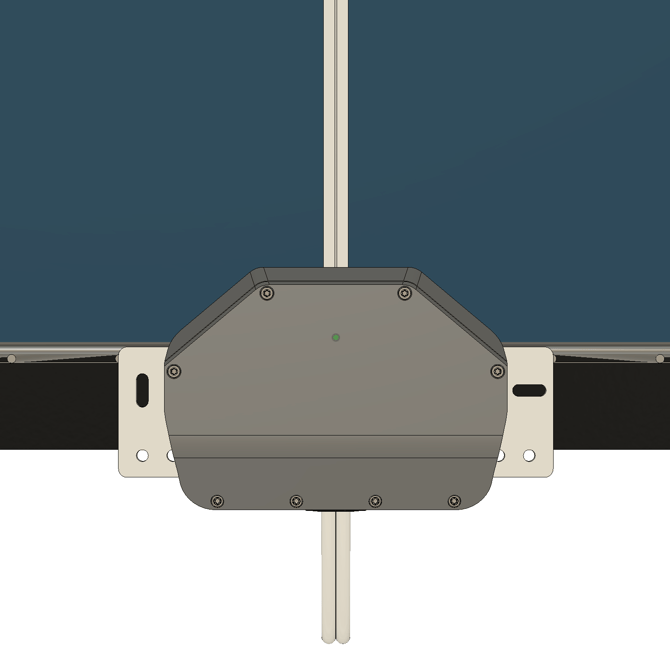
4. **Screw it down:** Drill and fasten the DCM to the bar, but don't fully tighten the screws yet — you'll do that in step 5. Choose one of the two options below.
⚠️ **Attention:** Only drill once you're sure of the position — holes in the cage can't be undone.
| **You have two options:** | |
| --- | --- |
| 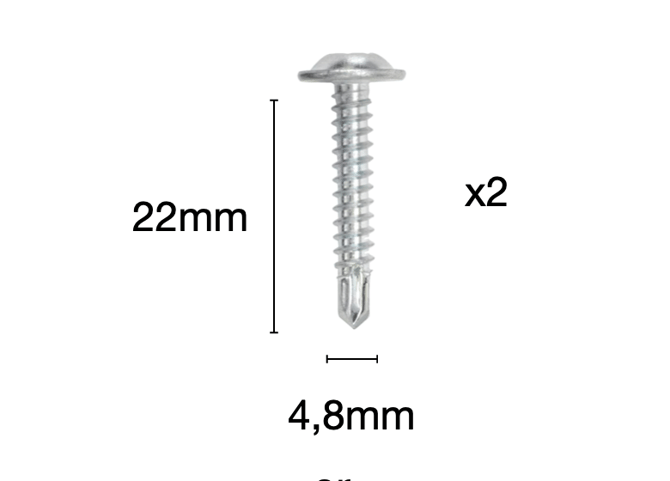 | Drill and fasten the DCM with 2x self-tapping screws (4.8x22mm). |
| 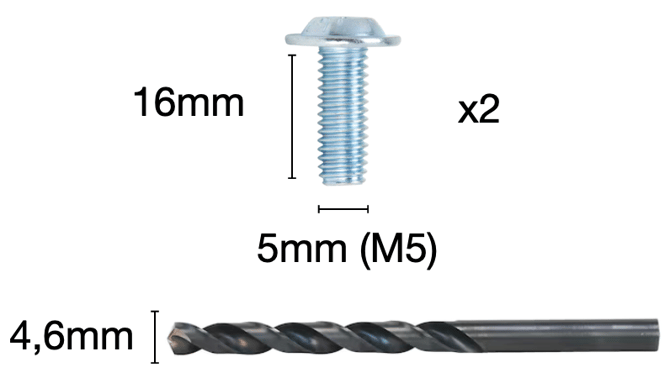 | Pre-drill a 4.6mm hole and fasten the DCM with 2x M5x16mm bolts. |
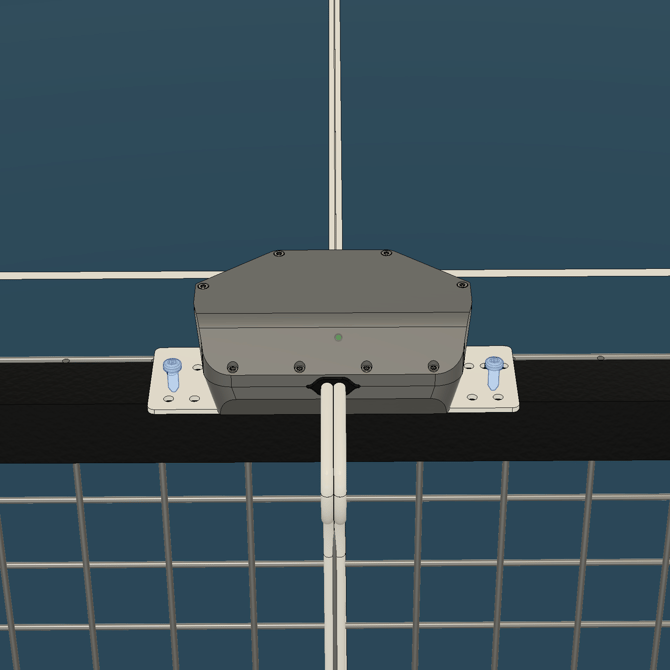
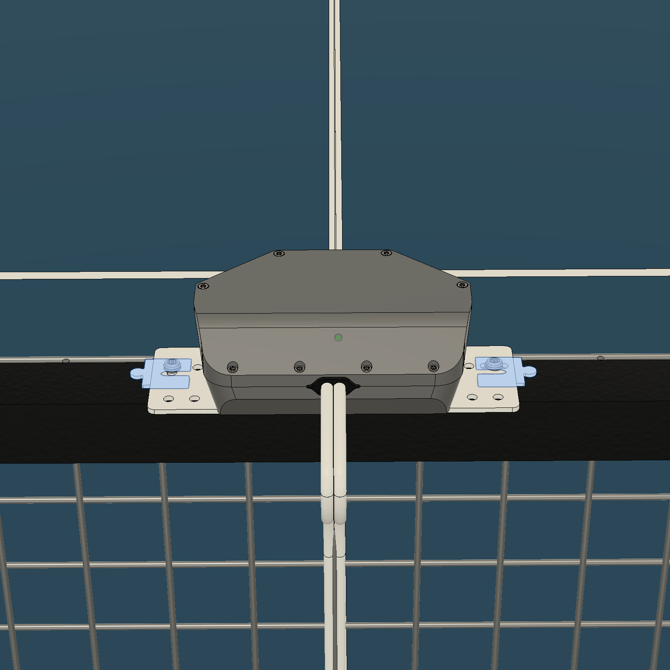
5. **Fasten the side plates:** Attach a plate to each side of the mount and fully tighten both screws.
**All done! 🎉 Jump to the end of this article to find out what’s next.**
- [**➡️ Continue with the next guides**](https://help.wingfield.io/en/dcm-padel#next-steps)
---
### Mounting Option 2: Back mount on the vertical post
⚠️ **Attention:** This mount only fits vertical posts with an 80mm depth.
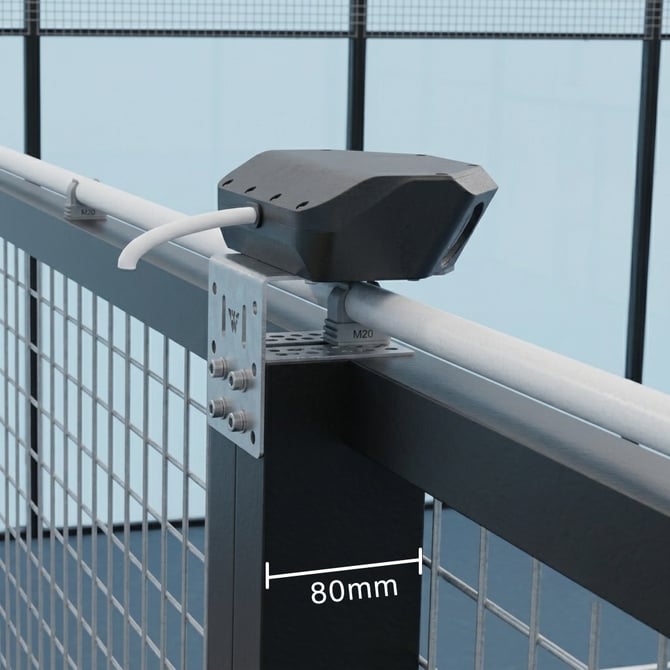
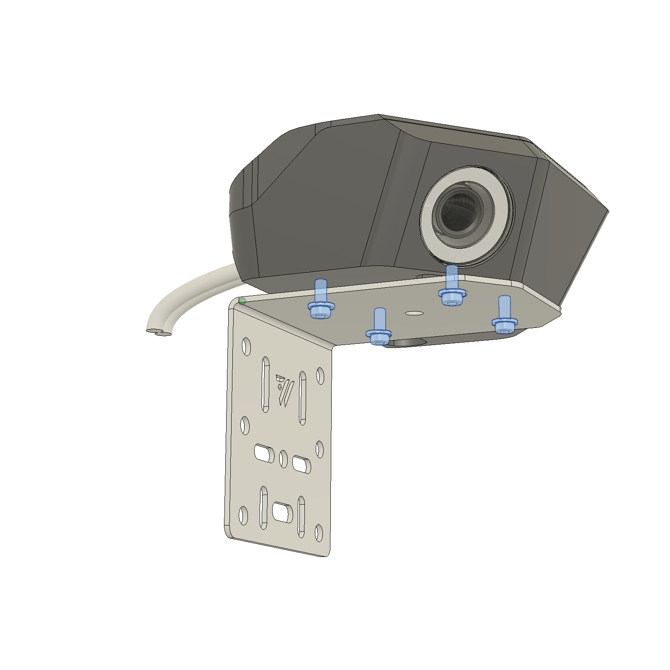
1. **Screw the DCM onto the L-bracket:** Use 4x M4x10mm screws and washers.
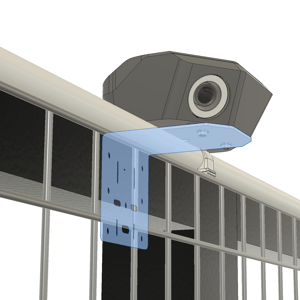
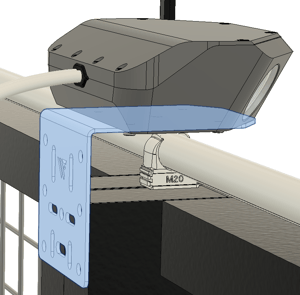
2. **Position the DCM on the cage:** Place the bracket on the vertical post, centered above the baseline of the court.

|  |  |
| --- | --- |
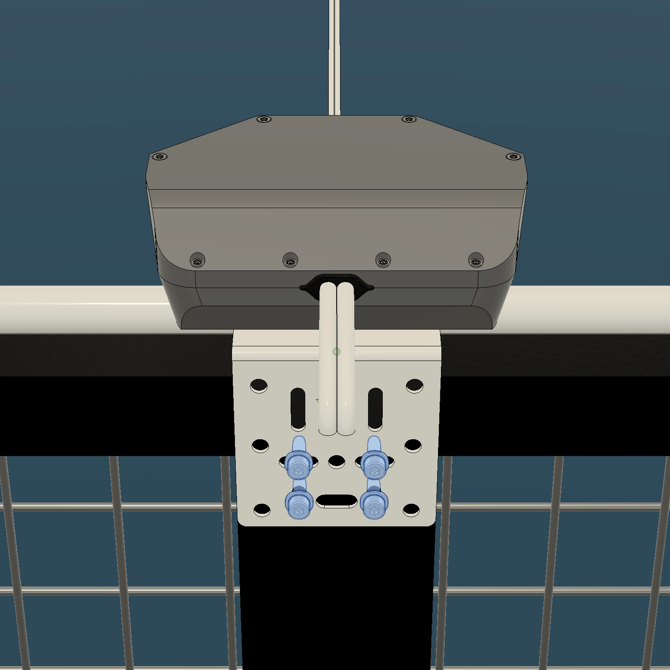
3. **Mount the bracket:** Drill and fasten the L-bracket to the vertical post. Choose one of the two options below.
| **You have two option** | |
| --- | --- |
| 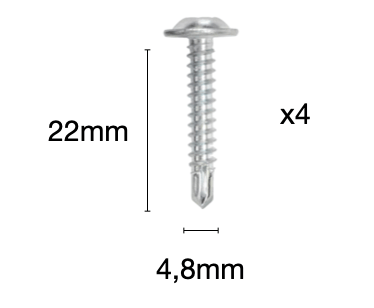 | Drill and fasten the L-bracket with 4x self-tapping screws (4.8x22mm). |
| 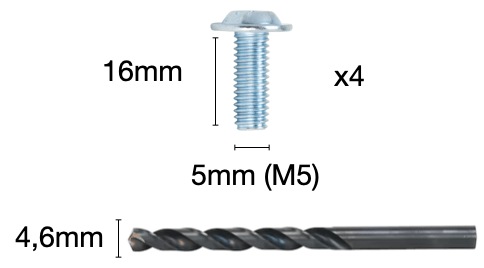 | Pre-drill a 4.6mm hole and fasten the DCM with 4x M5x16mm bolts. |
**All done! 🎉 Jump to the end of this article to find out what’s next.**
- [**➡️ Continue with the next guides**](https://help.wingfield.io/en/dcm-padel#next-steps)
---
### Mounting Option 3: Top mount (clamp)
💡 **Tip:** This option works best for quick, low-tool installs or test setups.

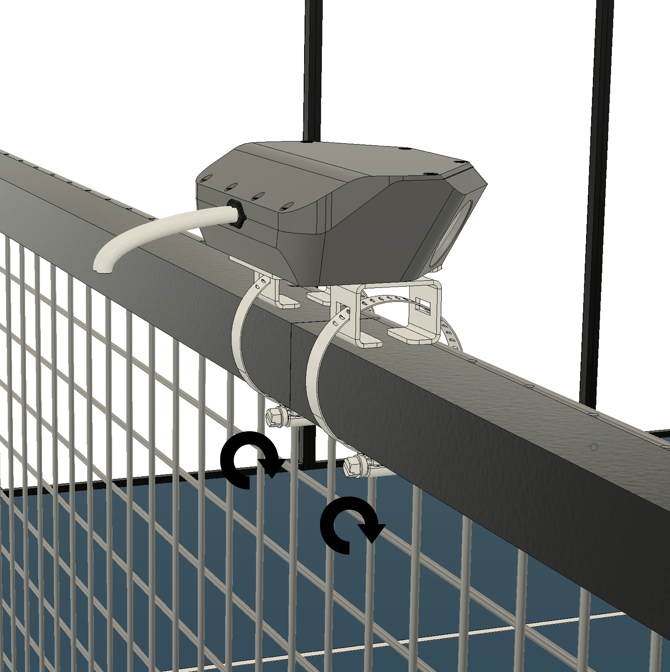
1. **Attach the clamp bracket:** Screw the clamp bracket to the bottom of the DCM using 4x M4x10mm screws and washers.
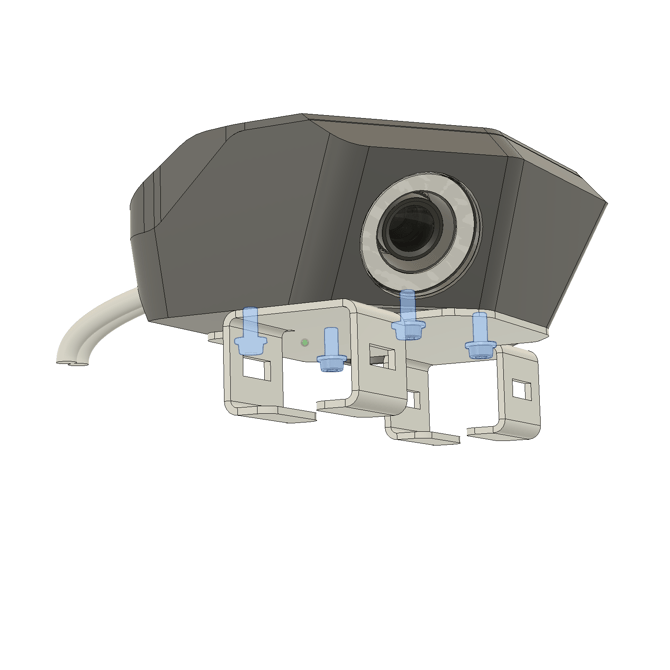
2. **Thread the hose clamps:** Feed both hose clamps through the bracket.
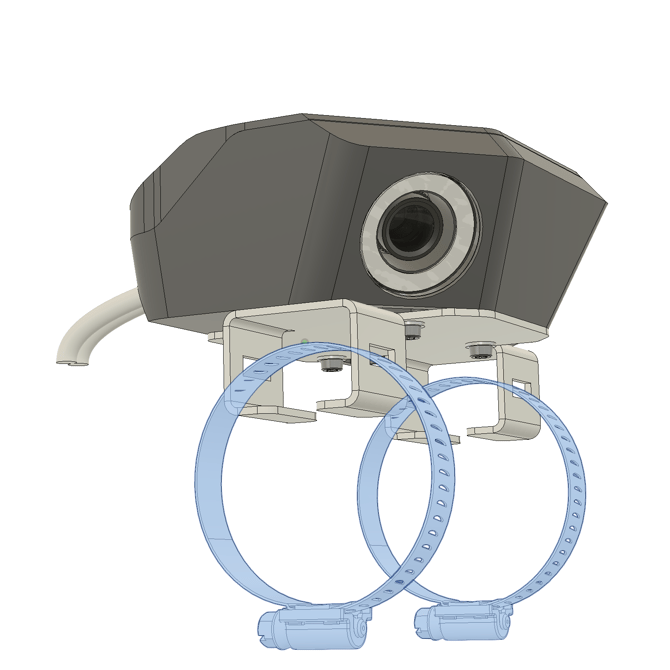
3. **Position the DCM on the cage:** Place the Dual Camera Module (DCM) on top of the crossbar, centered above the baseline. As a rule of thumb, the camera angle is correct when the rear edge of the camera housing is flush with the court-facing edge of the crossbar.

****
4. **Tighten:** Tighten both hose clamps until the DCM sits securely.
#### All done! What’s next? 🎉
As a final step, we’ll configure the Dual Camera Module for your court. The final calibration will be handled by our support team. Simply reach out to us in our shared WhatsApp group.
- [**➡️ Dual Camera Module Calibration**](https://help.wingfield.io/en/dcm/calibration?hsLang=en)
Depending on how you proceed and the order in which you install the individual components, one of the following guides may be relevant for you:
- ➡️**[Mounting Options for Streaming Camera –](https://help.wingfield.io/en/streaming-camera-padel?hsLang=en)**[Padel](https://help.wingfield.io/en/streaming-camera-padel?hsLang=en)
- ➡️ **[Court Terminal Installation -](https://help.wingfield.io/en/terminal-padel?hsLang=en)**[Padel](https://help.wingfield.io/en/terminal-padel?hsLang=en)
- [First steps with Wingfield](https://help.wingfield.io/en/first-steps-with-wingfield?hsLang=en#main-content)
- [Before Your First Wingfield Session](https://help.wingfield.io/en/first-steps-with-wingfield?hsLang=en#before-your-first-wingfield-session)
- [On the court](https://help.wingfield.io/en/first-steps-with-wingfield?hsLang=en#on-the-court)
- [About the Wingfield app](https://help.wingfield.io/en/about-the-wingfield-app?hsLang=en#main-content)
- [👤 Account & roles](https://help.wingfield.io/en/about-the-wingfield-app?hsLang=en#account-roles)
- [💬 App FAQ's](https://help.wingfield.io/en/about-the-wingfield-app?hsLang=en#app-faqs)
- [📲 Updates](https://help.wingfield.io/en/about-the-wingfield-app?hsLang=en#updates)
- [DUPR](https://help.wingfield.io/en/about-the-wingfield-app?hsLang=en#dupr)
- [Installation](https://help.wingfield.io/en/installation?hsLang=en#main-content)
- [Preparations](https://help.wingfield.io/en/installation?hsLang=en#preparations)
- [Installation Guide - Streaming Camera](https://help.wingfield.io/en/installation?hsLang=en#installation-guide-streaming-camera)
- [Installation Guide - Court Terminal](https://help.wingfield.io/en/installation?hsLang=en#installation-guide-court-terminal)
- [Installation Guide - Dual Tracking Camera](https://help.wingfield.io/en/installation?hsLang=en#installation-guide-dual-tracking-camera)
- [Troubleshooting](https://help.wingfield.io/en/installation?hsLang=en#troubleshooting)
- [Maintenance & Upgrades](https://help.wingfield.io/en/installation?hsLang=en#maintenance-upgrades)
- [Installation Guide Wingfield Box (Tennis)](https://help.wingfield.io/en/installation?hsLang=en#installation-guide-wingfield-box-tennis)
- [Installation Guide Wingfield Box (Pickleball)](https://help.wingfield.io/en/installation?hsLang=en#installation-guide-wingfield-box-pickleball)
- [Coach Corner](https://help.wingfield.io/en/coach-corner?hsLang=en#main-content)
- [Tools for coaches](https://help.wingfield.io/en/coach-corner?hsLang=en#tools-for-coaches)
- [Coaching with Wingfield](https://help.wingfield.io/en/coach-corner?hsLang=en#coaching-with-wingfield)
- [Blueprints for Drills](https://help.wingfield.io/en/coach-corner?hsLang=en#blueprints-for-drills)
- [Club resources](https://help.wingfield.io/en/club-resources?hsLang=en#main-content)
- [Financing & refinancing](https://help.wingfield.io/en/club-resources?hsLang=en#financing-refinancing)
- [Marketing](https://help.wingfield.io/en/club-resources?hsLang=en#marketing)
- [Admin dashboard](https://help.wingfield.io/en/club-resources?hsLang=en#admin-dashboard)
- [Operations](https://help.wingfield.io/en/club-resources?hsLang=en#operations)
- [DTB LK-Matches](https://help.wingfield.io/en/dtb-lk-matches?hsLang=en#main-content)
- [Basics](https://help.wingfield.io/en/dtb-lk-matches?hsLang=en#basics)
- [DTB rules](https://help.wingfield.io/en/dtb-lk-matches?hsLang=en#dtb-rules)
- [Match validation](https://help.wingfield.io/en/dtb-lk-matches?hsLang=en#match-validation)
- [Marketing tips for clubs](https://help.wingfield.io/en/dtb-lk-matches?hsLang=en#marketing-tips-for-clubs)
- [FAQ](https://help.wingfield.io/en/faq?hsLang=en)
- [Campaigns](https://help.wingfield.io/en/campaigns?hsLang=en)
- [General](https://help.wingfield.io/en/general?hsLang=en)
[](https://help.wingfield.io/?hsLang=en)
Copyright © 2025, © Wingfield GmbH