
These installation instructions apply to the following system types:

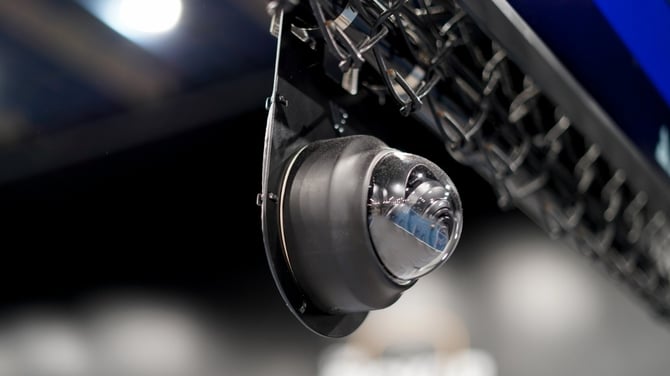
The Wingfield Streaming Camera delivers the live video stream of your match and is separate from the Dual Camera Module (DCM), which only handles tracking in Wingfield AI Pro setups. This guide covers the mounting options for tennis and pickleball courts, both indoor and outdoor.
In this article, you’ll learn:
- ✔ Which perspective is recommended for your court (Quick link)
- ✔ Which mounting options are available for wall, pole, fence, and custom solutions (Quick link)
- ✔ How to perfectly align your Streaming Cam (Quick link)
Where you place your streaming camera(s) is up to you
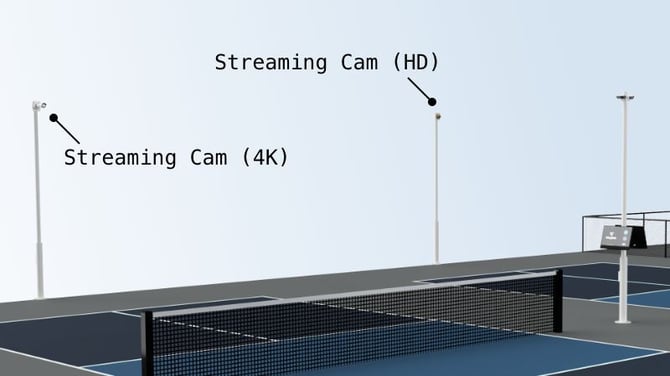
The streaming camera can basically be placed wherever it gives you the best view of your court. We provide mounting options for a standard installation — but depending on your desired perspective, the camera model (1080p vs. 4K) and what your individual conditions allow, you can get creative.
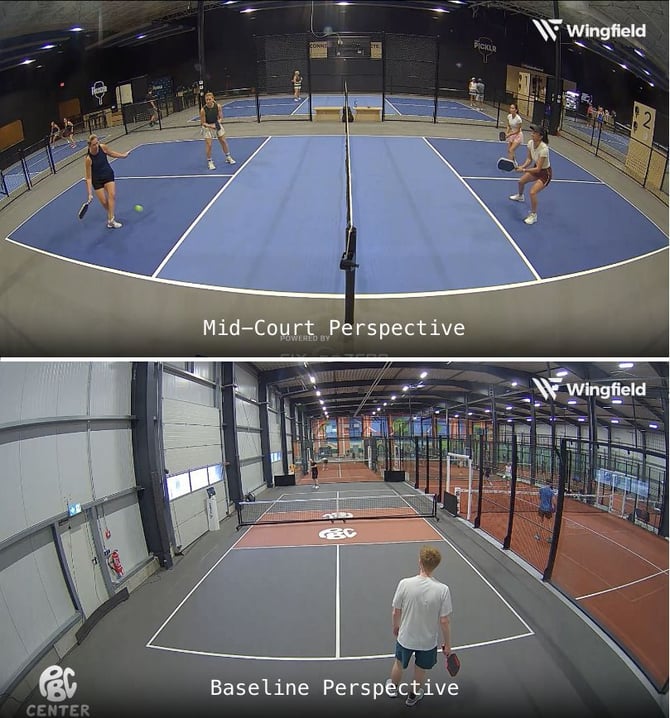
Baseline vs. Mid-Court Perspective
The most common perspective for tennis is the one behind the baseline. For pickleball, a mid-court perspective at net height can also make sense, as it captures kitchen (non-volley zone) action better.
High vs low position
Camera height has also a significant influence on the field of view: higher positions provide a better overview of the entire court, but players appear smaller. Lower positions give you a better perspective of the player close to the camera. The optimal height depends heavily on the structures available on-site.
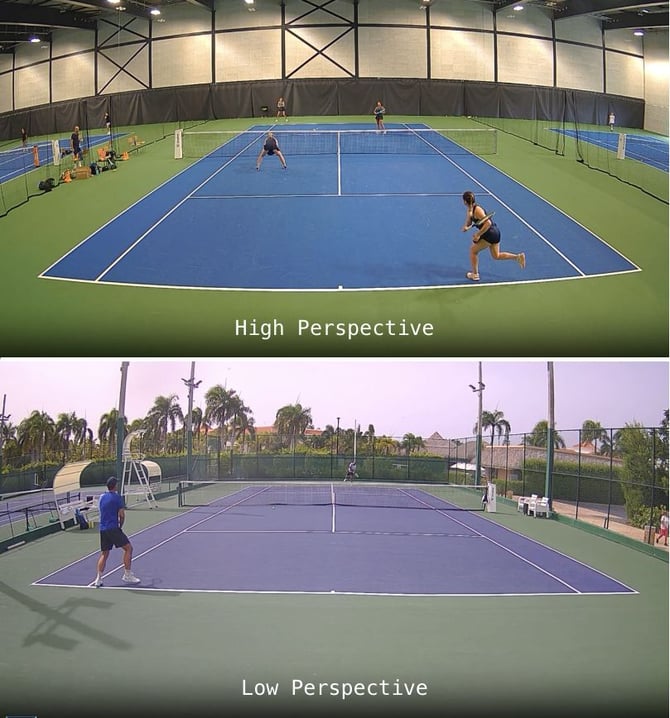
💡 Tip: As a general rule, we recommend mounting the camera as centrally as possible at a height of 3–4 m. Check beforehand which mounting options are actually available at your court.
☝🏼 By the way: The camera can still be aligned in the housing after mounting (vertical and horizontal panning), if necessary.
Common mounting options for your Streaming Cam
We have designed a special mounting plate for our Streaming Camera that allows you to react to the most diverse conditions at your facility. Attach the camera to the mounting plate before proceeding with the next steps.
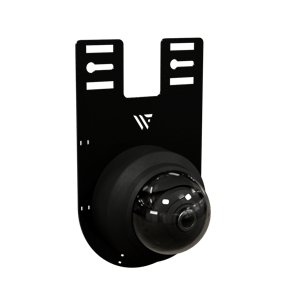
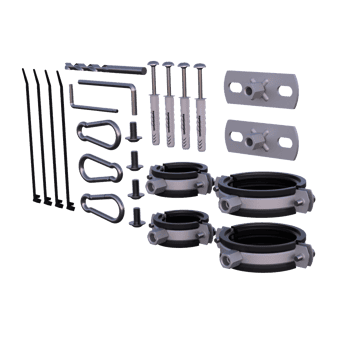
☝🏻 By the way: We usually provide different mounting options. Choose the one that works best for your individual court setup.
| Direct screw-in |
Permanent, long-term installation. Mount directly to walls other suitable structures. |
| Pipe clamps |
Stable and secure — ideal for mounting to poles or pipes. Choose the appropriate clamp size based on the pipe diameter to ensure a tight and secure fit. |
| Cable ties | Flexible — works with any bar width. To extend the cable tie and attach the camera to wider bars, simply connect two cable ties together. |
⚠️ Attention: Make sure you mount the camera the right way round. Use the Wingfield logo on the mounting plate as an orientation.
How do you want to mount your camera?
-
⏭️ a. Mounting on a fence or post
-
⏭️ b. Mounting on a solid wall
- ⏭️ c. Mounting on our standard pole solution
a. Mounting on fences or posts
Use our pole mounts or the pipe clamps to attach the Streaming Camera to poles. The scope of delivery includes different sizes for different circumferences.
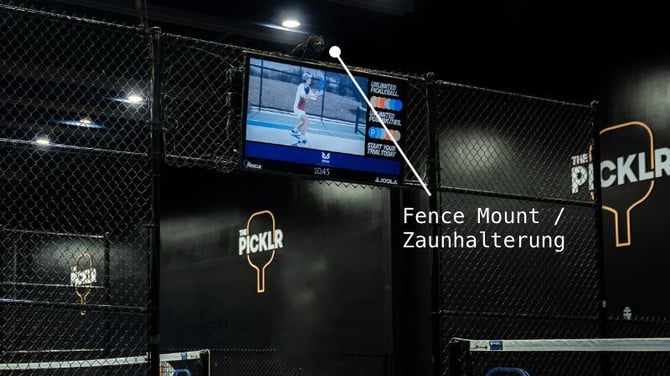
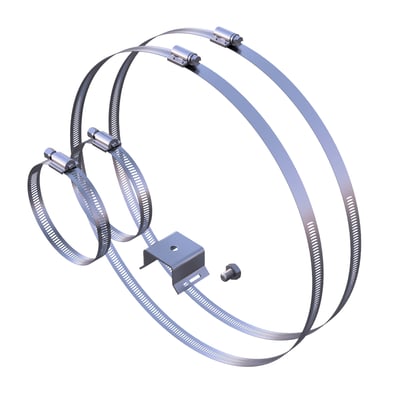
- Open both pipe clamps using a screwdriver.
- Feed the clamps through the slots in the camera mounting plate.
- Wrap the clamps around the fence pole and adjust the camera to the desired position and angle.
- Tighten the screws firmly to secure the camera in place.
b. Mounting on walls
This is the most common mounting option when installing the Streaming Camera behind the baseline. We recommend mounting the camera directly to the wall using screws. Make sure to choose the appropriate drill bits, screws, and wall plugs for the wall material.
💡Tip: If you’re installing a Wingfield Cam+ or Wingfield AI Pro setup and are unsure whether the camera height and angle are suitable, you can preview the camera’s live image directly on your court screen before drilling any holes. Once everything is plugged in, follow the steps in this article to configure your streaming camera and check the perspective.
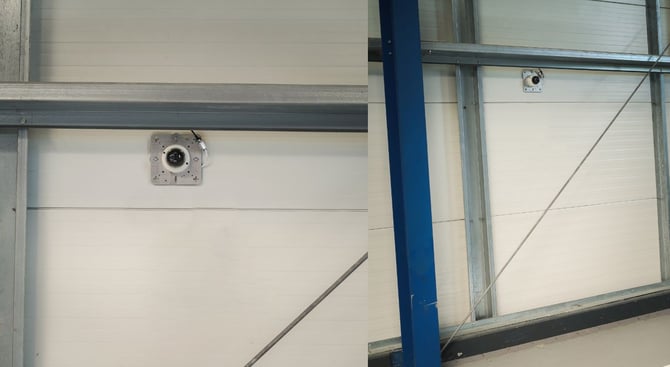
☝🏼 By the way: We show you the exemplary mounting on a solid wall (e.g. stone or concrete). If you mount the camera on a wooden wall or beam, you do not need to pre-drill holes or use dowels.
-
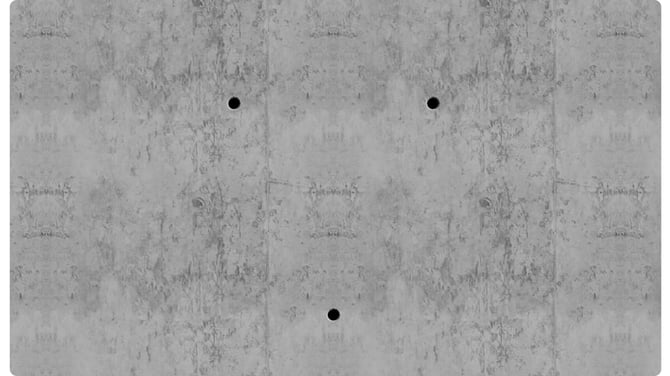
Use the mounting plate as a template to mark the drill holes. Getting help to position the camera as centrally as possible behind the baseline is recommended.
-
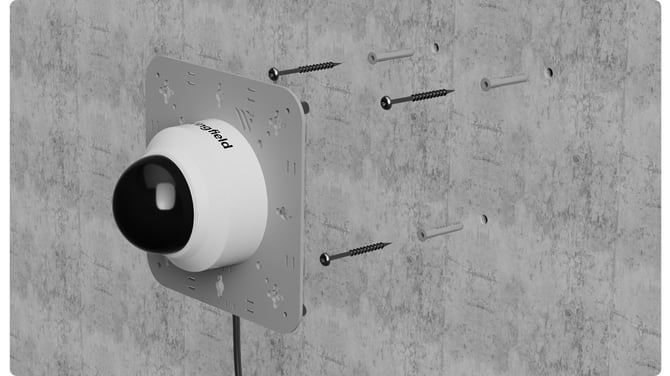
Always use the screws and dowels supplied. If you use your own screws, ensure their heads fit through the mounting plate. Let the screws protrude 0,78'' - 1,18'' (2-3cm) from the wall so that there is enough space to hang them.
-
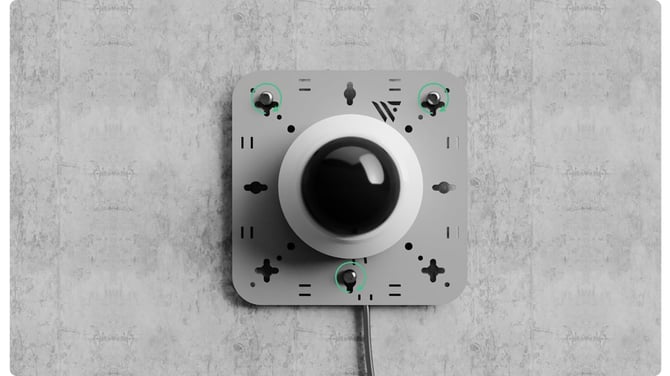
Hang up the mounting plate. Be careful not to pinch the network cable anywhere and tighten the screws.
Mounting on our standard pole solution
If you have installed our standard pole solution, you can simply screw the mounting plate directly onto the pole.
Connecting & Routing the network cable
- Remove the glass dome of the camera and connect the LAN cable to the.
- Add strain relief for the LAN cable. Run a cable tie through the two small slots in the mounting plate and secure the LAN cable.
- Run the LAN cable from the camera to the PoE switch (for Wingfield Court setups with a court terminal, the PoE switch is typically mounted behind the screen).
- Connect the LAN cable to one of the PoE ports on the switch. Make sure to use a PoE-enabled port, as the camera will not receive power otherwise.
⚠️ Caution: If you prefer to use your own LAN cables, make sure they are CAT6 or higher to ensure a reliable connection.
⚠️ Caution: For outdoor installations, attach the waterproof connector to the Ethernet cable that connects to the Streaming Camera. The matching part of the connector should already be attached to the Streaming Camera.
Align the Dome Camera
To align the streaming camera, you first need to remove the glass dome.
- Twist off the glass dome
- First adjust the tilt angle so that your desired image section is taken into account.
- Adjust the horizontal angle to ensure that the image is not upside down.
- Then adjust the tilt angle so that your desired image section is covered.
- Put the dome cover back over the camera and tighten the two fixing screws.
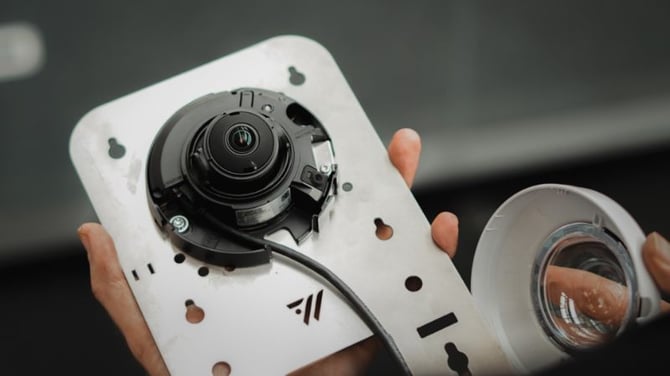
⚠️ Caution: Never forcefully rotate the focus/zoom lens after disassembling the lens body. Doing so may result in incorrect image focus due to a motor error.
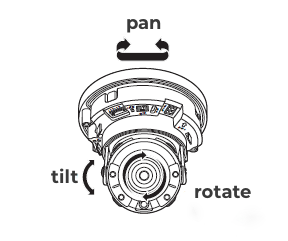 |
Pan = turning the camera to the left or right |
| Tilt = turning the camera up or down | |
| Rotate = rotating the lens around its own axis |
💡 Tip: If your camera is already connected and configured, use the live camera feed to align the camera angle and perspective more easily (possible with Wingfield Cam+ and Wingfield AI Pro).
When aligning the camera, check these three points:
- ✔ Space above the player far from the camera: This is particularly relevant for tennis to make sure the far player's ball toss is well captured. Grab a ball and simulate the toss in your test shot.
- ✔ Distance between baseline (or sideline) and bottom edge of the image: At the same time, make sure there's enough space behind the closer baseline. Otherwise, shots from players close to the camera could fall out of frame too often. When in doubt, find the optimal compromise between points 1 and 2.
- ✔ Is the baseline parallel to the bottom of the image? Ensure that the baseline is fairly parallel to the bottom of the image. At the same time, make sure that there is enough visible space behind the front baseline.
What's Next?
To complete the Streaming Camera setup, continue with the Streaming Camera Configuration article.
⚠️ Caution: For Wingfield Cam+ and Wingfield AI Pro setups, the court terminal must already be installed and powered on before you can proceed with the configuration.
Depending on your setup and the order in which you install the individual components, you can continue with one of the following guides:
- ➡️ Court Terminal Installation Guide – Pole (Wingfield Cam+ and Wingfield AI Pro only)
- ➡️ Dual Camera Module Installation Guide - Pole (Wingfield AI Pro only)
Stuck on-site and not sure what to do next? We've got you covered!
📞 Service hotline: 🇺🇸 +1 929 395 1078 | 🇪🇺 +49 511 51525901
💬 WhatsApp: click here
📨 E-Mail: service@wingfield.io