
These installation instructions apply to the following system types:
- ✔ Wingfield Cam+
- ✔ Wingfield AI Pro
In this article, you’ll learn:
- ✔ How to configure your Streaming Cam at the Court Screen (🔗 Quick Link)
- ✔ How to align your camera angle (🔗 Quick Link)
We recommend configuring and aligning your camera after completing the following steps:
- ✔ Your Court Screen is set up and connected to power and the internet.
- ✔ Your Streaming Camera(s) are mounted.
☝🏼 By the way: Once the camera has been detected on your network and the configuration is complete, you can unplug it again and proceed with the final cabling.
Streaming Cam Configuration
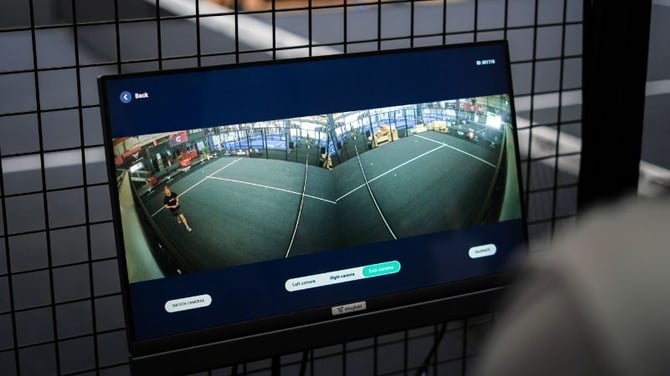
You can display a live camera feed of your cameras on the court screen, making it easier to optimize the camera angle and perspective.
- Click on the ⚙️ icon in the home screen of the Court Terminal
- Tap Baseline Camera
- Add your first or second camera
- Enter the MAC address / S/N number you noted earlier (depending on the camera model)
Once the camera is connected, you can display a live stream of your camera on the court terminal by clicking on Align camera.
⚠️ Caution: Make sure the Ethernet cables of your Streaming Cam(s) are connected to the PoE ports of your switch. The switch must also be powered on and correctly connected to your Court Terminal.
⚠️ Attention: To configure the Streaming Camera, your Court Terminal must be connected to the internet.
How to align your Streaming Cameras
The process for adjusting your streaming camera’s viewing angle differs depending on the camera model – HD Dome or 4K Bullet camera.
💡 Tip: This is a two-person job. Ask someone to help you — one person adjusts the camera angle from the ladder, while the other checks the live image on the Court Screen and gives directions.
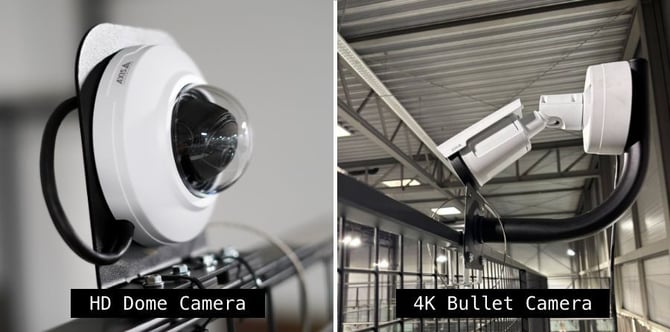
a) HD Dome camera alignment
- Twist off the glass dome
- First rotate the lense so that your desired image section is taken into account.
- Adjust the horizontal angle to ensure that the image is not upside down.
- Then adjust the tilt angle so that your desired image section is covered.
- Put the dome cover back over the camera.
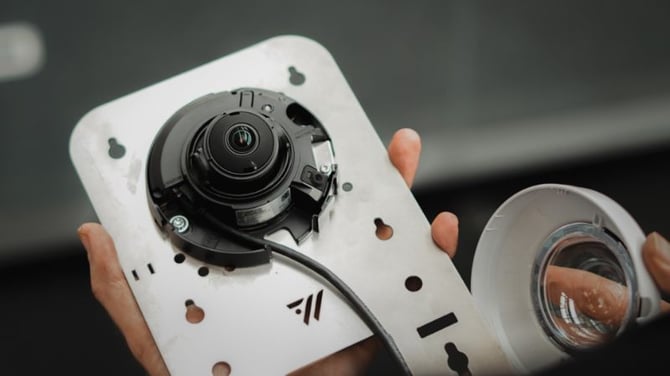
⚠️ Caution: Never forcefully rotate the focus/zoom lens after disassembling the lens body. Doing so may result in incorrect image focus due to a motor error.
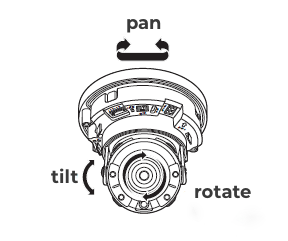 |
Pan = turning the camera to the left or right |
| Tilt = turning the camera up or down | |
| Rotate = rotating the lens around its own axis |
b) 4K Bullet camera alignment
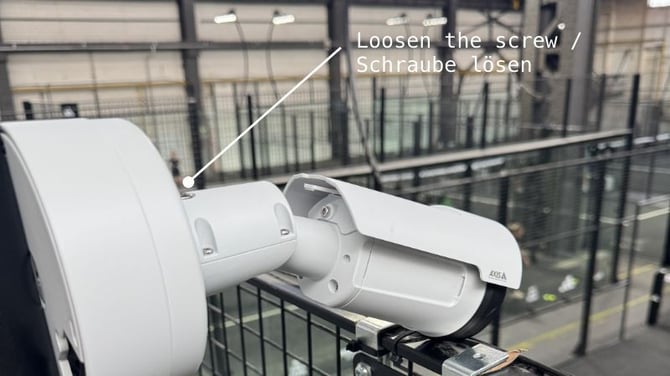
- Loosen the screw at the top of the camera using the appropriate Allen key.
- Adjust the tilt and horizontal angle, then rotate the camera until the desired area is visible in the frame.
- Tighten the screw again to secure the camera in position.
What's Next?
Depending on your setup and the order in which you install the individual components, you can continue with one of the following guides:
- ➡️ Dual Camera Module Installation Guide - Padel Court (Wingfield AI Pro only)
- ➡️ Dual Camera Module Installation Guide - Pole (Wingfield AI Pro only)
Stuck on-site and not sure what to do next? We've got you covered!
📞 Service hotline: 🇺🇸 +1 929 395 1078 | 🇪🇺 +49 511 51525901
💬 WhatsApp: click here
📨 E-Mail: service@wingfield.io