
These installation instructions apply to the following system types:

The Wingfield Court Terminal combines touch display and PC in one unit. This guide is for venue operators and installation teams mounting the unit on a free-standing pole for pickleball or tennis courts.
In this article, you’ll learn:
- ✔ How to mount the Court Terminal to our Pole solution
- ✔ How to connect the Court Terminal with the other devices (Quick link)
We recommend installing the pole solution when...
-
no wall or fence is available.
-
plan to install two Court Terminals back-to-back on a shared pole.
💡 Tip: Still in the planning phase and want the pole to blend seamlessly into your court's visual concept? If you're already working with a fence contractor for your court fencing, ask them for a custom solution in the same style as the rest of your fencing — instead of ordering our standard pole.
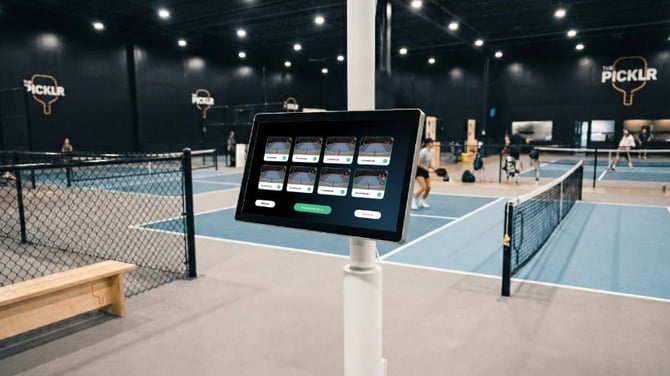
1. Find the right position for the pole
The optimal position might depend on the setup you are installing. Since the pole can also be used to mount the Dual Tracking Camera (Wingfield AI Pro), the distance to the sideline is crucial for good tracking quality. What matters depends on your setup:
| Setup | What to consider for positioning |
|---|---|
| Wingfield Cam+ | No strict distance requirement — pick the position based on practical usability during a match (e.g. easy access, unobstructed play). |
|
Wingfield AI Pro (or a planned future upgrade) |
Stick to the recommended distances in the table below to ensure accurate tracking quality. |
💡 Tip: Only installing a Cam+ setup for now, but considering an AI Pro upgrade later? Position the pole according to the AI Pro distances from the start — that saves you from having to relocate it later.
☝🏻 By the way: If you also plan to mount a Dual Camera Module (DCM) on this pole for your Wingfield AI Pro setup, position the pole level with the net line — alongside the court, centered on the height of the net. The sideline distance values in the table below still apply.
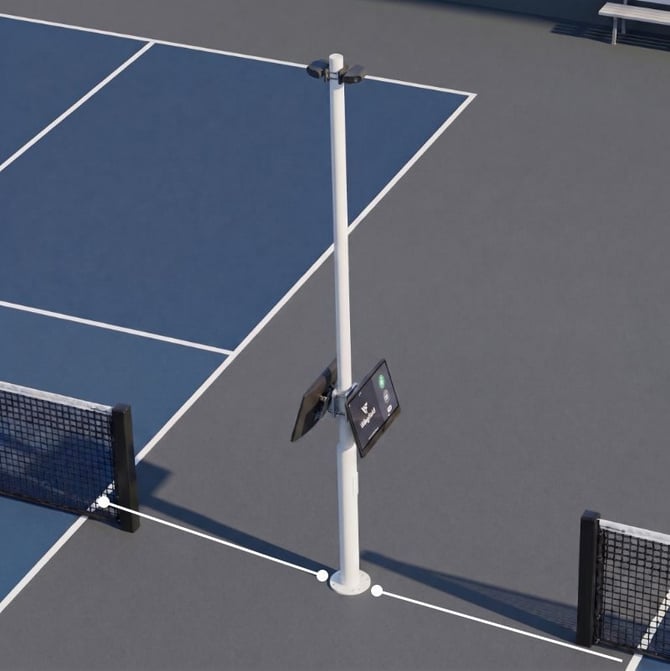
This image shows a multi court setup with a back-to-back installation
The right pole distances for your Wingfield AI Pro setup
Measure from the center of the pole to the sideline or baseline. If you are installing a Wingfield Cam+ setup without tracking and with no plans to upgrade in the future, you can skip this section and go straight to Step 2.
| Sport | Distance to sideline | Rating |
|---|---|---|
| Tennis | <2 m / <6.6 ft | ⏳ TBD |
| 2 m / 6.6 ft | ✅ Good | |
| 3 m / 9.8 ft | ✅ Good | |
| 4 m / 13.1 ft | ⚖️ OK | |
| > 4 m / >13.1 ft | ❌ Bad | |
| Pickleball | < 1.2 m / <4 ft | ⏳ TBD |
| 1.2–1.8 m / 4-6 ft | ✅ Good | |
| 1.8–3.0 m / 6-10 ft | ⚖️ OK | |
| > 3.0 m / >10 ft | ❌ Bad |
2. Drill the hole and anchor the pole
⚠️ Attention: You will need a drill or rotary hammer and a 12 mm masonry drill bit for this step.
Step by step:
- For Wingfield AI Pro: Measure the required distances to the sidelines of the court (see table above)
- Position the pole's ground plate exactly at your marked spot and mark your drill holes through the four slots of the ground plate.
- Using a 12 mm masonry drill bit and rotary hammer, drill four holes into the floor.
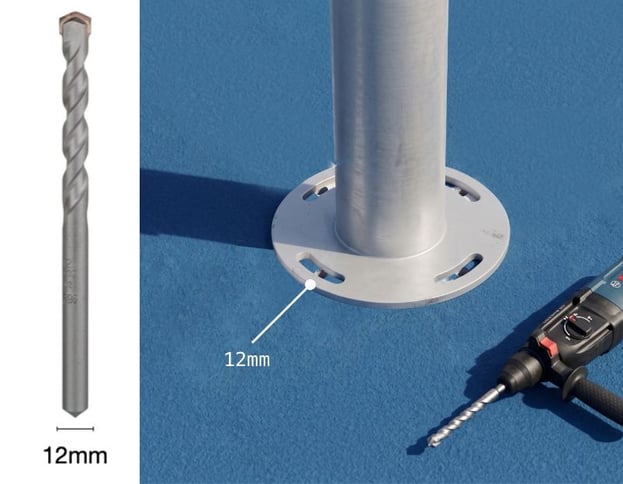
- Remove the drilling dust from the holes with a vacuum.
- Insert the four 85 mm ground anchors through the slots and tighten to secure the ground plate to the floor.
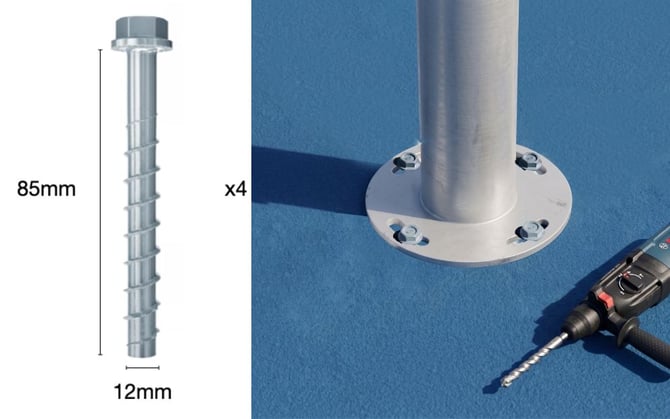
💡Tip: Mark the anchor length (85 mm) with tape on your drill bit so you drill deep enough every time.
3. Attach the three pole segments
In this step, you'll assemble the pole's three segments one at a time, directly on top of the lower segment with the ground plate you anchored earlier.
☝🏻 By the way: If you plan to mount a Dual Camera Module (DCM) on the top segment later for your Wingfield AI Pro setup, this step matters a lot.
- Place the middle segment and bolt it to the lower segment.
- Place the top segment on top. Align it so the DCM mounting point faces straight toward the court — this is what lets the camera capture the court squarely later on. Under this link you find instructions for the Dual Camera Module installation on the pole.
⚠️ Attention: If a segment is twisted and doesn't point exactly toward the court, loosen the internal locking collar between the middle and top segment, realign the segment, then retighten the collar.
4. Attach the pole mount to the pole
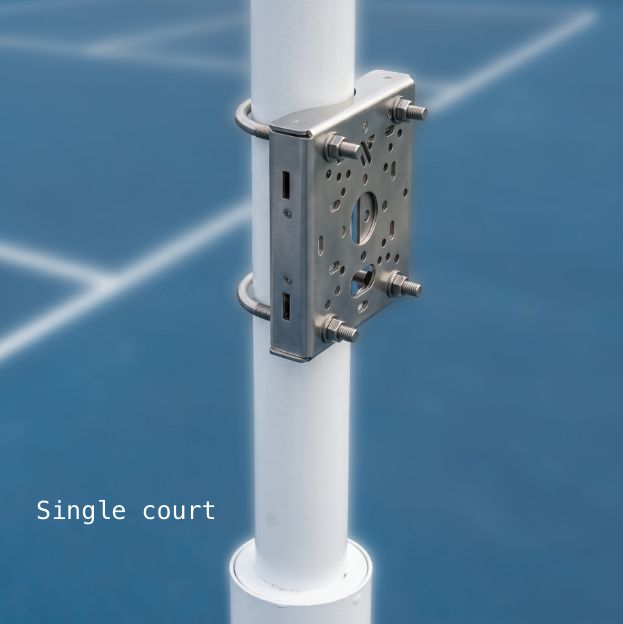
The pole mount is an adapter plate that you attach to the pole using U-bolts (pipe clamps). The screen will be bolted onto this pole mount in the next step.
The process differs slightly depending on whether you're installing a single or two Court Terminals:
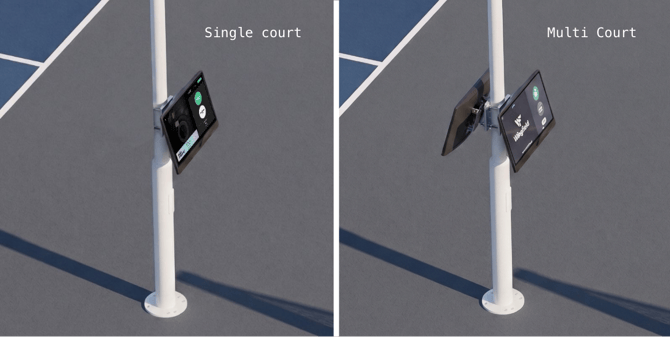
a. Single Court Terminal
- Position the pole mount at your desired height on the pole, facing toward the court.
- Route the two U-bolts around the pole and through the pole mount's holes.
- Tighten the four nuts evenly until the pole mount sits flush and firm against the pole.
b. Two Court Terminals back-to-back
For this configuration, you'll use a larger pole mount variant with attachment points on both sides — one for each terminal.
- Position the pole mount at your desired height on the pole. Since it covers both sides of the pole, no specific orientation toward the court is required here.
- Route the 4 long screws through the pole mount's holes on each side of pole.
- Tighten the 4 nuts evenly until the pole mount sits flush and firm against the pole.
⚠️ Attention: Before final tightening, make sure the pole mount is perfectly level — it's the base for both mounting plates you'll attach later.
5. Attach the TV mounting arm to the pole mount
💡Tip: Grab a colleague to help you complete the next steps together.
Step by step
-
Position the mounting arm for the screen on the plate and align the bolt holes. Fasten the arm with four M5 bolts (16 mm length, 5 mm diameter).
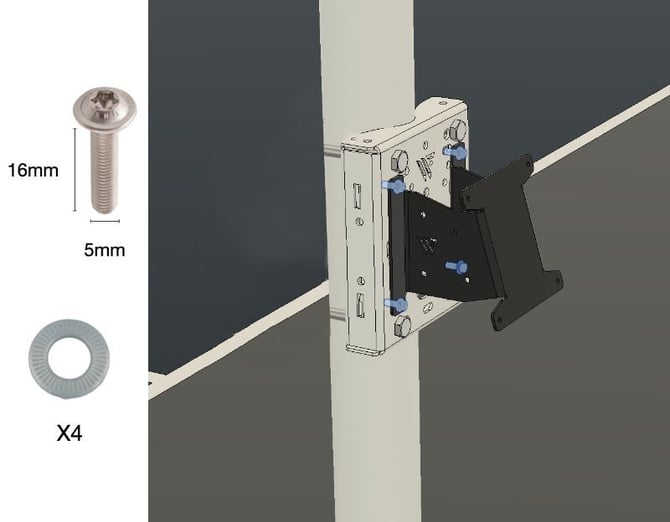
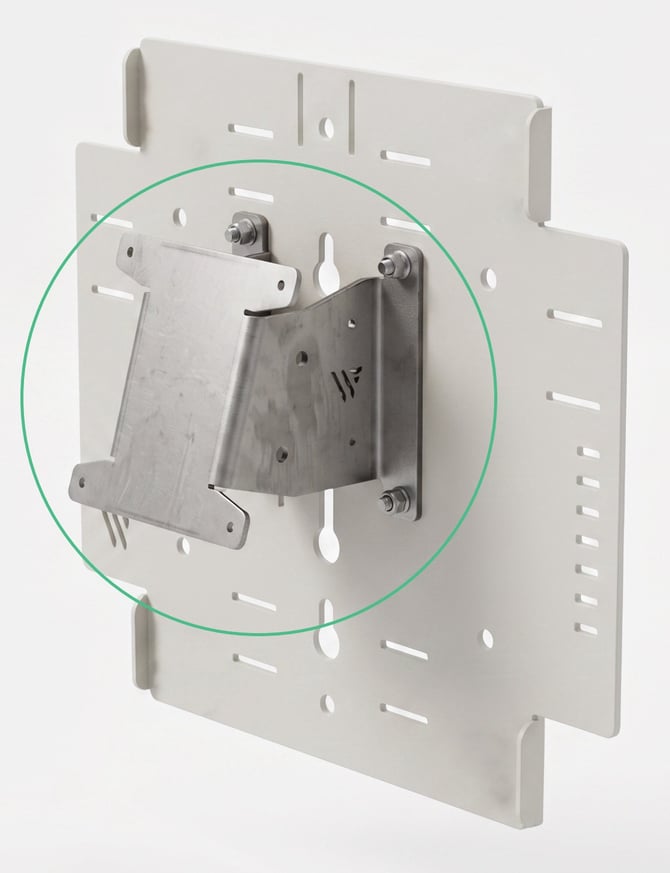
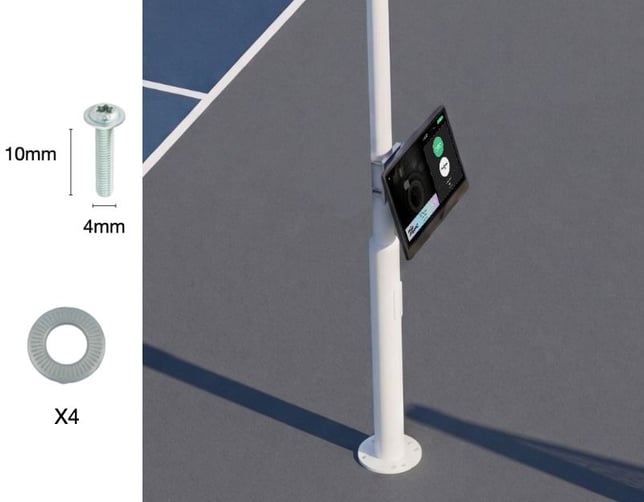
- Position the display's rear mounting points onto the arm. Secure the display at the four main points using bolts (10 mm length, 4 mm diameter) with washers.
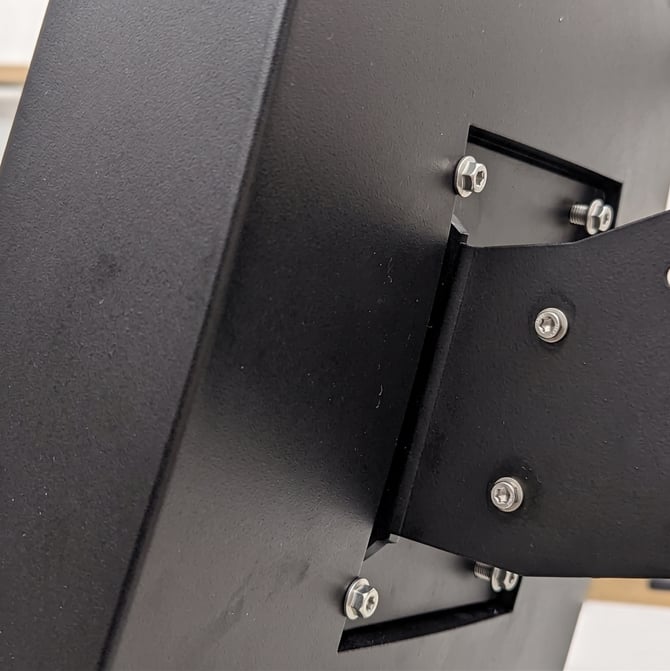
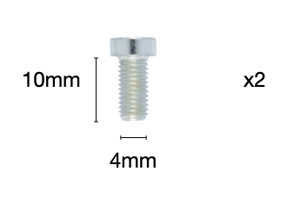
- Now attach the mount for your PoE switch to the side of the mounting arm of the display using 2x bolts (10 mm length, 4 mm diameter).
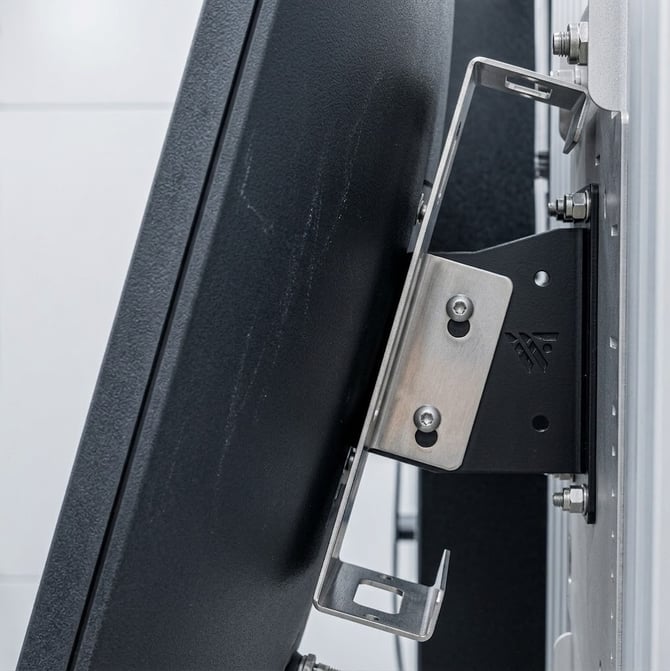
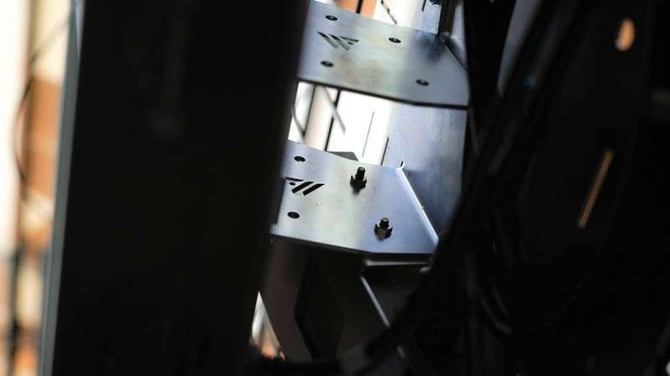
💡 Tip: Choose the side of the POE mount based on the direction the power cable runs to the connection ports on the display — this keeps the wiring clean and avoids crossing it over the arm.
6. Connect the ports of the POE switch
Now insert the PoE switch into the dedicated mount that you previously attached to the screen’s mounting arm.
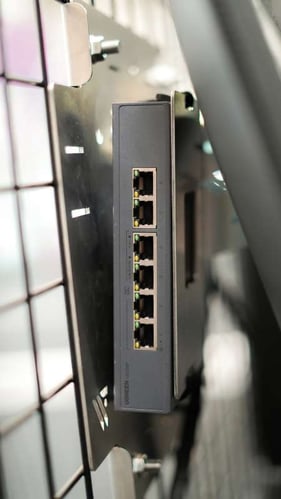
How many devices you connect to the PoE switch depends on your court setup and the internet connection you want. The switch has multiple ports, giving you flexibility. You have the following options:
- Connect your streaming camera(s): You can power up to two cameras through the PoE switch using an Ethernet cable (CAT6a or higher). Streaming cameras must be plugged into one of the PoE ports, since that port handles both power and data transfer.
- Connect the Court Terminal: Connect the switch and the Court Terminal using an Ethernet cable (CAT6a or higher). Use one of the switch's standard Ethernet ports for this connection.
- Internet connection via LAN (optional): If you're connecting your Wingfield court to the internet via LAN cable, this doesn't require a PoE port — a standard LAN port on the switch is sufficient.
⚠️ Caution: In a Wingfield AI Pro setup, only the streaming camera connects to the PoE switch — not the Dual Camera Module (DCM). The DCM connects directly to the dedicated DCM port on the display.
7. Connect the rear ports of the touch display
Now connect the cables on the back of the unit – it has three ports:
- 🛜 PoE switch – to connect with streaming cameras (and network)
- 🔌 Power – to power your whole system (incl. cameras)
- 👁️🗨️ Dual Tracking Camera Module (DCM) – only if you install a Wingfield AI Pro system!
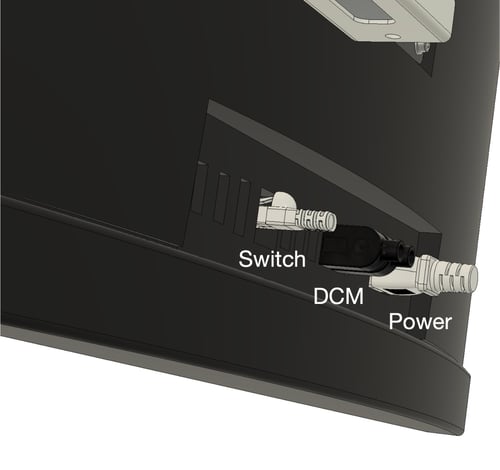
⚠️ Caution: Only connect cables while the unit is powered off, and plug each connector into its matching port.
Done! What's Next?🎉
Depending on your setup and the order in which you install the individual components, you can continue with one of the following guides:
- ➡️ Mounting Options for Streaming Camera – Pickleball & Tennis
- ➡️ Mounting the Dual Camera Module - Pole (Wingfield AI Pro setups only)
Stuck on-site and not sure what to do next? We've got you covered!
📞 Service hotline: 🇺🇸 +1 929 395 1078 | 🇪🇺 +49 511 51525901
💬 WhatsApp: click here
📨 E-Mail: service@wingfield.io