⚠️ Attention: If you only install a Wingfield Box without a Baseline Camera, you can proceed directly to the next article. Simply connect your Wingfield Box to the power supply and select the desired Internet connection (LAN or WIFI) in its configuration mode.
👣 Step 1 | Mount the PoE-Switch inside the Wingfield Box Body
⚠️ Attention: To avoid running cables unnecessarily, we always recommend attaching the PoE switch to the Wingfield Box's housing. If you have several Wingfield Boxes, our multi-court setup may make more sense.
|
🛠️ In this step, you will need the following: |
| Allen key |
| 1x screw for the Switch Mount |
|
Switch Mount
|
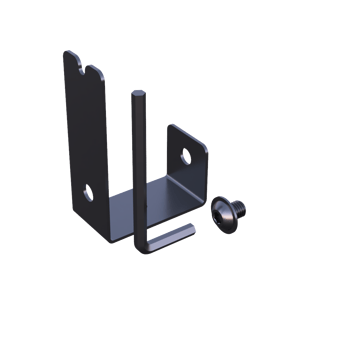
- 1️⃣ Remove the top of the two screws on the Wingfield Box's integrated net post. We recommend to stow the screw somewhere where it will not get lost.

- 2️⃣ Attach the shorter end of the Switch Mount to the net post of the Wingfield Box. You can insert the supplied Allen key through the free hole. After the following cabling, you can hook the switch into the device.


👣 Step 2 | Cabling of a Wingfield Box with Baseline Camera
The PoE switch included in the scope of delivery of your baseline camera is the interface between your Wingfield Box, your Baseline Camera, and your router.
⚠️ Attention: A single Wingfield Box with a Baseline Camera can only be operated via a LAN connection to your router.
| 🛠️ In this step, you will need the following: |
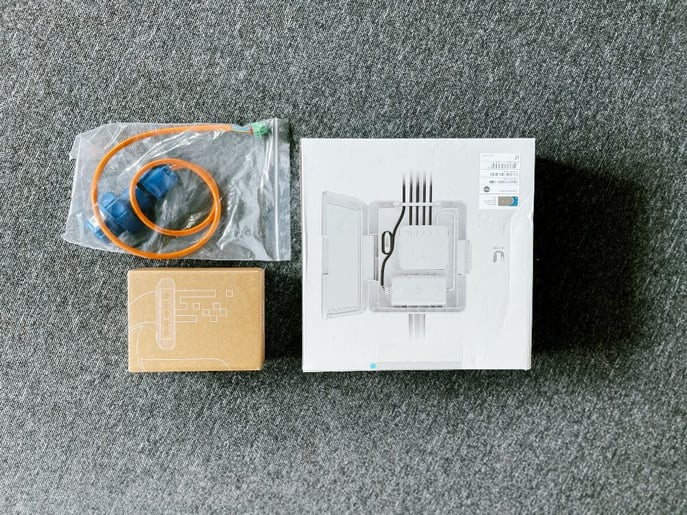
| Wingfield Box power cable |
| PoE Switch incl. accessories |
| Waterproof attachment for the LAN cable (you will find it in the bag with the installation accessories for the Wingfield Box Brain). |
| 1m LAN cable (you will find it in the bag with the installation accessories for the Wingfield Box Brain) |
| LAN cable for the distance between your router and the switch (⚠️ Attention: Not included in the scope of delivery) |
- 1️⃣ Remove the cap from the power connector. Use the supplied power cable (15m) or a cable you have prepared and connect it to the Wingfield Box. Give the box a few seconds to wake up.
- 2️⃣ Insert the PoE adapter into the top slot and the switch into the bottom slot of the housing.
- 3️⃣ Connect both components and plug the short white cable into the left Ethernet port of the switch (see illustration).

- 4️⃣ Connect the PoE switch directly to a free socket on your Wingfield Box (230V) using the mains plug supplied (1m IP44 mains cable). When the white LED lights up, the device is in operation.
- 5️⃣ Hang the switch in the previously prepared holder.
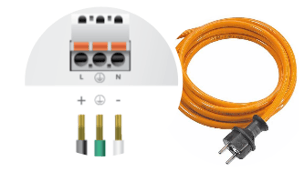
☝🏼By the way: If you have not placed your switch in the box and have already laid a power cable to the appropriate location, the electrician can also connect the three-core power cable directly to the PoE switch.
The PoE switch requires a separate power connection. Its maximum power is 60W (actual consumption 5W—10W).
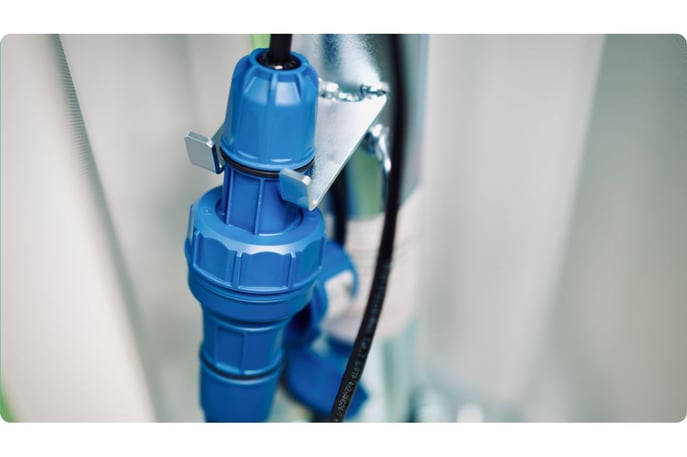
- 6️⃣ Plug the waterproof connector into the end of the 1m LAN cable that runs from the switch into the Wingfield Box. You can find out how to attach the connector to the cable in the video below.
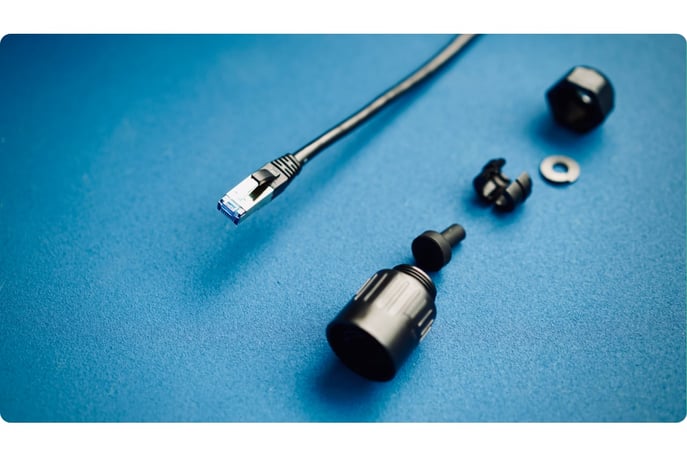
💡 Tip: If necessary, remove the small rubber tab over the "click mechanism" of your LAN cable to make installation easier (see video).
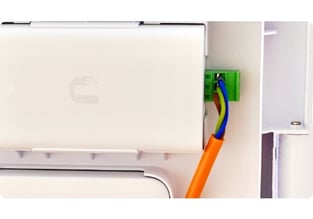
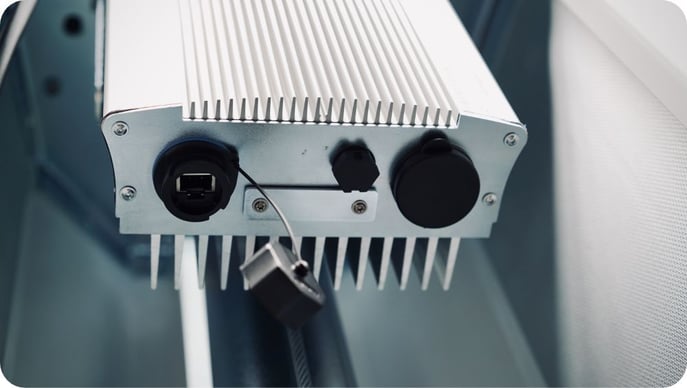
- 7️⃣ Now connect the Wingfield Box and the switch with the 1m LAN cable. Remove the twist lock on the left-hand side of the Wingfield Box processor to expose the network connection. Plug the prepared network cable into the connection provided and screw the lock in place.
- 8️⃣ Now connect your router to your PoE switch using a LAN cable.
⚠️ Attention: As distances from the router to the Wingfield Box may vary greatly, this cable is not part of our standard delivery! It should be of CAT6a quality or better to ensure fast data transmission.
👣 Schritt 3 | Start the configuration mode on the Wingfield Box
As soon as your Wingfield Box is connected to your power supply, it will automatically boot up and start the configuration mode. Select the connection via LAN cable and wait until a connection has been established.

⚠️ Attention: If the Wingfield Box cannot connect to the Internet, you will find possible reasons and options for action in this article.

Installation Guide🔧
Nearly done! 🎉 We will guide you step by step through the installation of your Wingfield Box:
➡️ Continue with: Calibrate the Wingfield Box

You are standing on the court and don't know what to do? We are here for you!
📞 Service hotline: +49 (0) 511 51525901
💬 WhatsApp: click here
📨 E-Mail: service@wingfield.io